Friday, February 18, 2011

Cosmic Storm, Nebula, hmmmmm help me think of a name for these.

This was just a totally fun day at the torch.  It's the first time I tried the "Boro effect" and while I do think using certain silvered glass may be easier than this method, it sure was fun!  And it didn't require a lot of thinking to get the right mix to work.  I'm sure I could improve with some more experimentation though as I've seen some very beautiful beads created this way.  Here are all the beads I made today and I'll get into detail along with some close ups below.

All stringer used in these beads is made with Val Cox Dark Iris Gold #1 on 591018 lt. brown transparent.  The fist 5 beads are made with a stringer without a lot of mashing, heating and re-applying the frit and steps before pulling.  The second stringer which starts with bead 8 has a lot of frit heavily worked into the glass before pulling.
1. Base of 591026 teal lt. encased with 591031-M emerald green pale, stinger, encased with clear.
2. Base of 591536 carnelian, stringer, encased with 591080 lavender pale.
3. Same as 3 but with a clear encasement.
4. Base of carnelian, encased with pale lavender, stringer, clear encased.
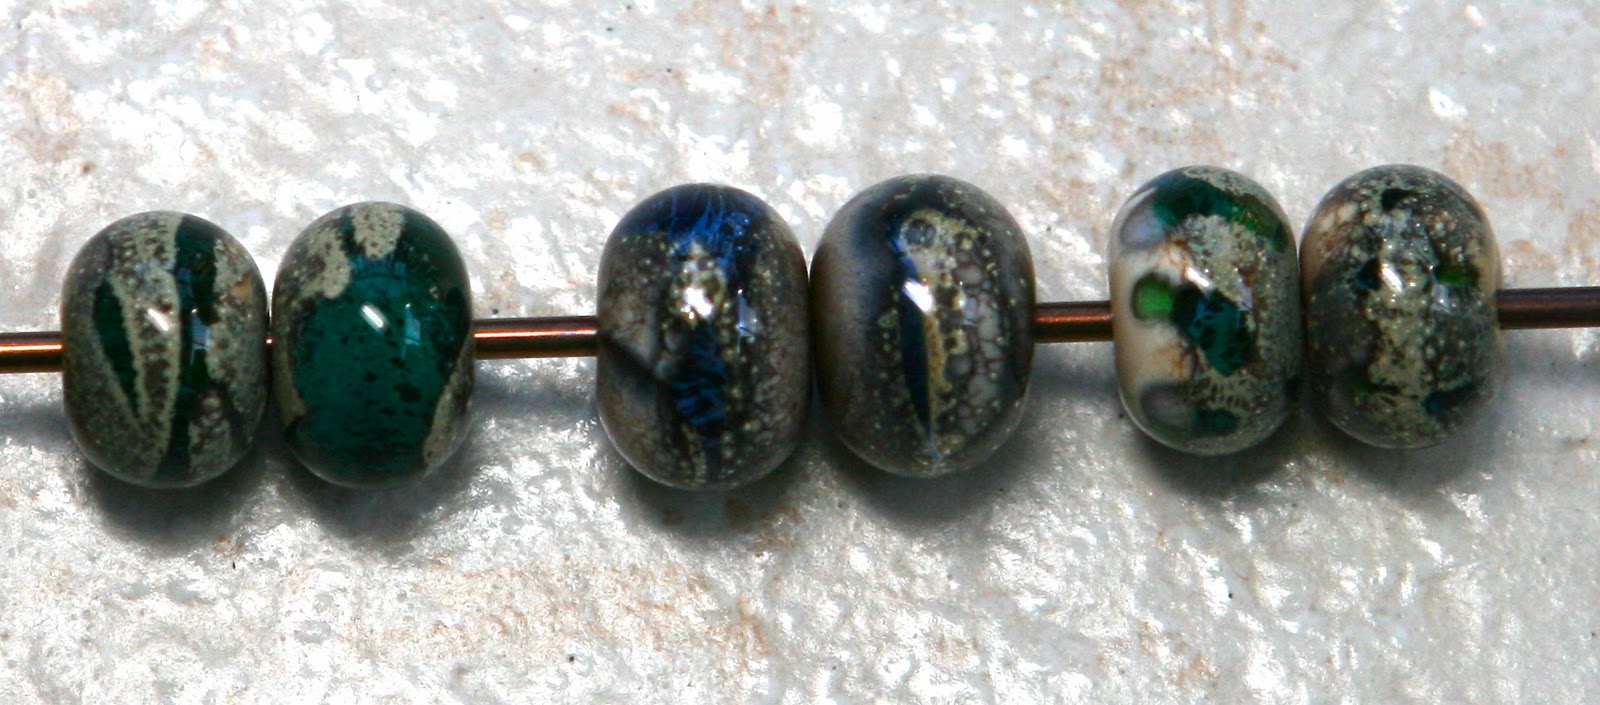
5. Base of 591058 ink blue, stringer, clear encased. It collapsed on me but I wish it was an implosion.
6. This one I did a little differently.  I started with a wheel of ink blue melted into a narrow bead, then I put a wheel of lt. brown transparent on that and kept it in wheel shape and rolled the wheel in the iris gold frit - I used quite a bit. I melted it all down and the encased in clear.
7. Base of 591076 transparent striking red and done the same as in the 6th bead.
8. Base of transparent striking red but done with the stinger method.  This bead has the second stringer I made for this project which had a lot more frit smashed into it before pulling and it seems to create a better effect. 

These are all made with the heavily fritted stringer - if those are even words.  These are my favorites of the day!
9. Base of 591422-T orange translucent, stringer, clear encased.
10. Base of pale green emerald, stringer, clear encased.
11. Base of teal lt, pale green emerald dots, stringer, encased with pale lavender. LOVE this bead!
12. Base of carnelian, stringer, encased with pale lavender.
13. Base of _59 rose quartz, stringer, encased with pale lavender.
14. Base of carnelian, stringer, encased in rose quartz
15. Base of orange translucent, stringer, encased in rose quartz.
16. Base of CIM Pulsar, stringer, encased in pale lt. blue.  AWESOME!
17. Base if ink blue, stringer, encased in clear all over a small white core.
18. Base of a green rod I had on my work surface - probably elphaba or nile - stringer, encased in pale emerald green.
That's it for this type of bead but I did experiment a little more with some things I have been wanting to try.

19. Base of 591256 pink dark premium, encased with _59 rose quartz.  I dotted it with white and then I had some transparent pink stringer laying on my work space but it must have had some frit mixed in with it and it came out all dirty and yucky.  I think I need to toss that stringer!
20. Base of translucent orange encased in rose quartz.  Just trying a new orange with this application to see how it turned out compared to previous orange base testing.  Nothing special here.  Had an error in my encasing. 
21. Same as 20 but with proper encasement. 
22. Base of 511272 phoenix, encased in rose quartz.  NICE color!  Very close to what I have been trying to get!
23. Base of carnelian, band of kalypso, clear encasement.  Eh, nothing too special but it does look better than this photo shows.
24. Base of ivory, band of kalypso, clear encasement.  I really like this bead!!!!
25. Base of pink dark premium, band of kalypso, clear encasement.  I like this bead too!  Again, photo does not show the nice colors and separation in the bead.

I'll be taking a break from bead making for a couple of weeks.  I will be back with more beads as soon as I can.  Thanks for stopping by to see my latest batch of beads!

Sunday, February 13, 2011

Silver Testing with a Few Good Ones!

Last day at the torch I was testing a few new rods of Double Helix silvered glass.  It's always interesting that is for sure.  Some turn out and some look like mud and unfortunately this time I also had some pretty ones with thermal cracks - major bummer!  Here are a few of my favorite ones from the day:


Okay so now for my log information.  First 16 beads are all testing Psyche by Double Helix.
First in this series has a base of Opal Yellow and dots of Psyche.  It's just a dark muddy mess and the photo actually looks better than the actual bead.  2. Ivory base, dots of Psyche - reduced, center dots are capped in clear, left side dots are capped with light aqua and the right side dots are capped with rose quartz. Some of the dots were covered with the transparent before reducing just to see the affect and those just stayed a muddy color.  3.  Base of Canyon De Chilly with small side dots of Psyche being covered before reducing.  Center dots were reduced before being covered with clear.  Another muddy mess. 4.  This bead has potential.  It is a base of silvered plum with random sm messy dots and strings of Psyche melted in then a messy application of clear stringer melted in, reduced, then large clear dots in the typical triangle formation all melted in.  Raised side dots of Psyche are reduced.  The bead is a bit dark all by itself but I can see using dots of silvered plum, with Psyche on top of that, all on a lighter base color bead.  I'll be trying that soon! 5.  Black base, opal yellow dots with port-holes of Psyche.  This is a pretty cool looking bead.  I got some awesome shades of purple on these.  6.  CIM Sangre base with random application of Psyche.  A bit dark by itself but again has good potential for a different type of bead. 7. Silvered Plum base with one side having Sangre dots before applying the Psyche. 

These two beauties are my favorite beads of the day!  The one on the right has a thermal crack though.  Guess I will be doing some research to figure out exactly why it happened - could be a few things. The bead on the left is a base of opal yellow, encased with Psyche, reduced, spiral ring of clear melted in, encased in clear and then smooshed into shape.  Very cool focal bead if I do say so myself. I might just wear this one around my neck tomorrow!  Second bead has a base of opal yellow, sangre and silvered plum and then the same application as the first one except I also added some silvered ivory stringer.  I love the blues and greens in this one!

These are the last 7 in the series of testing Psyche.  1.  has a base of Ivory and then I can't remember what I did.  My neighbor came to watch me make beads and I totally forgot to take notes after I made this bead.  I know I placed a dot below the Psyche but I can't remember for sure but I think it was white or copper green.  Oh well. Beads 2 and 3 both have bases of Hades and Psyche and clear glass.  Bead number 4 has a base of Dirty Martini which produced some nice shades of red, purple and blue.  5. is awesome in real life but the photo didn't pick up the awesome purples.  It is Psyche on a base of copper green.  Will use this again for sure!  Bead 6 is flipping cool!  It is a base of Psyche wrapped in pure silver wire and then encased.  The last bead is a base of Psyche, clear stinger melted in, reduced and then encased.  Nice effect!

The next Double Helix glass I tested was Kalypso.
The first bead of this set of 3 is the only one with Kalypso in it because I took a quick break from the silvered glass.  So the first bead has a very unique sunset look to it. I had read about this combination and wanted to try it.  It is a base of 591256 pink dark pastel and a simple stripe of Kalypso down the center and then encased.  I like it.  This is the only bead I used Kalypso in today.   Now this is where it sort of makes sense that I strayed from testing my silvered glass.  Since I had the pink out and it is a new glass for me, I wanted to try it with an encasement of rose quartz and crocus.  I think they turned out pretty nice and the purple especially will work nicely for my purple customers - or rather my customers who are purple fans!

This set I'm testing 503132.1 Terranova 2.1.  First bead is a base of Hades and it's just to dark too even bother explaining what I did with the Terranova.  Second bead is fantastic!  It is a base of copper green and dots of T 2.1.  Amazing purples and pinks and even a bit of red in these clear encased port-holes.  Third bead is a simple ivory base with the T 2.1. dotted on and I tried the striking method on this.  Nothing special color wise but it's kind of a nice organic looking bead.  4th bead is a base of T 2.1 simply struck and encased.  Last bead is a base of yellow opal encased with T2.1 struck then the same process I always use in this type of bead.  This one did not get a thermal crack!!!  I am not sure I am getting the color on this that I'm supposed to.  I need to read up a bit more about the Terranova 2.1 glass.

Last in my testing today is 503127.2 Terra 2.  Again I'm not sure I'm getting all the colors possible out of this glass.  It's like I'm almost there but just need to find a way to tweak it a bit.  Back to the bead forums for me tonight!  The last one in this series is  my favorite of these with the large bead being my second favorite - again another thermal crack - darn it!
1. Base of Hades, dots of T2, reduced, encased.  2. Base of Hades, etc. 3. Base of opal yellow, sangre, and copper green, encased with T2 and the usual application of clear spiral and clear, smoosh, etc. 4. Base of Canyon De Chili. 5. Base of Dirty Martini with flat dots being reduced and raised dots being struck. 6. French Blue base, center dots of T2, side dots of black right before applying T2, all reduced and capped with clear.  Very nice purple colors are produced over the black dots.

Some of the beads are so colorful that I took photos of them in different lighting conditions.  Here are some more pix of them just to get the idea of how colorful these beads actually are.
 Unfortunate thermal crack on this one and it will get bigger until the entire bead breaks in half :-(


 The other bead with the dreaded thermal crack.

That's it.  I'm caught up finally with my blog.  Now I can go back to my torch and start experimenting tomorrow!
As always, thanks for reading my blog and taking the time to send me your comments!!!  I do appreciate it very much!

Saturday, February 12, 2011

Turquoise, Cream and Amber (Topaz)

I think this may be the largest set of beads I have ever made to go together.  I love them and am going to have to decide if I'm going to sell the entire set or make a few things with them myself or a little of both.  Hmmm... decision decisions. 
I had a lot of fun making these!  I also included some basic spacer beads of the main colors which I don't usually do.  They are made from a mix of light and dark turquoise, ivory, light and dark amber and some dots of white to help reflect some of the transparent glass.

Now for a few close ups:


Now that's what I call a nice handful of pretty beads!!

Only one more post and I'll be caught up but those beads are still on the mandrels so it won't be until tomorrow that I get them photographed.  They are my experiments with some new silvered glass.

Still catching up

More beads to post!  First up are my earring pairs that I made on Feb. 10, 2011.  I sold two pair to my neighbor before I got the photos taken!  One pair was especially nice - very organic.  Maybe I can get her to let me take a photo of her finished jewelry.  She is just learning and this will be her 3rd and 4th pair to make - Go Pam!

Here they are in smaller groups so they can be seen better.  The first three sets are made with aqua bases and white decoration.  Next is turquoise and ivory.  The 5th and 6th pair are both red bases with white stringer but the second pair of red beads didn't photograph well.  The 7th pair are turquoise, aqua and emerald. All the rest are the organic stone style with assorted colored transparent glass.  The last pair really absorbed the glass so the colored part is very very small but they still look pretty cool in person.


Here are a couple of beads I made with some filigrana glass I had laying on my table.  I was thinking of making them into earring pairs but I think they are too large and heavy for earrings.

The rest of these are more for my records than anything.   They are more of my attempts at different applications I have been working on.  I wasn't very successful. 
First two are a base of 591042, Purple Med. Transparent.  First one is rolled in silver foil and burnished and the second is rolled in silver leaf and burnished - didn't seem to make a difference.  Silver was not burned off on either bead.  Next Rubino Oro is applied in triangle style with small dots of 591058-LV, Violet Ink Blue Light Prem. Trans. Odd and then all is melted in. First bead has raised dots of 591042 and the second one has raised dots of Rubino Oro.  Both are struck before putting away.  I have seen this application on several of the bead forums and I just can't get it to work the way it's supposed to.  I think it's because I am not using the exact same color rods and it's because of a chemical reaction.  If anyone knows what I'm doing wrong, please let me know.  The second two in the series are also failures and again I think it's because I'm using glass that I think is close but not exactly what is listed in the formula I was working from.  I have used the same application in both of these beads with the second one having a white core.  I was hoping it would give it some light so the design would show up.  They are bases of 591058-LV with small dots of Rubino Oro melted in then silver leave is applied and burnished and then all is melted in a fairly hot flame.  I capped the center dots with clear and one side is capped with crocus and the other side with rose quartz.  I was trying this technique from page 13 of Spotlight on Silver Vol. 2.  Maybe some day I'll make these pretty "Barley style" beads.  If I'm really lucky I'll get to take a class one day from Michael Barley himself!!!
Now this is a bead I tried a few posts back and lesson learned was not to make these with silver foil and only use silver leaf.  So my silver leaf came in the mail last week and I gave it another try.  Still not great but it's working!  I will be able to make these at least!  Directions for these Barley "Window Beads" is also on page 13 of Spotlight on Silver Vol. 2.

 I made some more of those orange/pink and purple Pixi Dust beads.
 And also gave it a whirl on silvered plum and turquoise. 

I don't remember if I made this bead on the same day but I liked the way it turned out.  No notes on it but I remember it was a base of light ivory and I think the darker dots are 591730 Choco-lotta Noir.  The little dots are some aqua that I had laying around on my work space.


Only two more posts of bead batches and I'll be caught up.  Next batch is really nice and I will be putting them up for sale on my artfire account as soon as I get those photos cropped.  I think you will like them so check back soon!!!

A lot of catching up to do

I made some beads and then I had a guest for a week (which I had to take time off to play and have fun in the sun!!!) and then I made some more beads but now I have to see if I can remember what I did when I made all those beads from a few weeks ago.  Here are all the beads I made on Jan. 29, 2011:

First up are my results from trying to duplicate a color I read about on one of the bead forums.  I've been trying to produce that pink/orange color for a while and this is another recipe:
 I took photos inside and outside to try and capture the translucent quality of the beads.
They remind me of life-saver candies.  Anyway, from left to right: 1. Transparent orange base rolled in Sparkle Silver White Satin Pixi Dust. 2. Same but had a core of white. 3. Same as one but I used Clockwork instead of Trans. orange and it would not strike to orange for some reason - maybe the pixi dust? 4. Same as three but with a white core - this time it did strike - hmmmm...   This one is actually the closest to the color I was trying to achieve.  5. Decided to try some other colors that might look pretty with the sparkly of the pixi dust so this one has a white core, encased in rose quartz, rolled in same pixi dust.  The pixi dust doesn't really show well over the rose quartz.  6.  Here I changed the pixi dust to Glitter Diamond White and made the same bead as I did in the very first bead in this set.  The ones made with this pixi dust look like gum drops or some sugared candy.  7.  Same as the third bead. 8.  Same as the fifth bead.  9.  White core, encased with Crocus, rolled in Glitter Diamond White Pixi Dust - and this is a really nice bead.  I will make more of these for my purple lovers!

I was experimenting with a new type of rose made from a frit stringer.  These are not very good but just keeping them in my log of applications.  Please ignore the ugly beads!  I made a few spacers on the far right for other projects.

Continuing on my adventure to make nice frit beads - gives me fits really - frit fits!  This one didn't turn out too bad.
I used a base of Vetro pink, coiled with a ring of clear that I rolled in Tutti Fruiti Frit, melted it down gently so it would spread evenly and then to add some of my window bead practice I added the side curtain effect.  This is probably the first frit bead that I have actually been happy with.

These are more frit beads that are okay - but for them to look really nice they need to be in full sun otherwise they just look like pink beads.  My notes on these are poor but the frit I used was Gold Pink and I think the core was made with Whisper and sometimes a little core of white before the Whisper.  Not a big deal because I don't think I will be making these beads again.

And lastly I made a bunch of beads using Black, French Blue, white and a Dark Transparent Blue I had laying around on my work space so I am not exactly sure which one it is:

I'll be trying to get caught up with more blogging soon.  I made some nice organic earring pairs and worked with my new silvered glass.  So check back soon if you want to see those.

Tuesday, February 1, 2011

New beads up for sale on Artfire!

I'm taking a quick break from my torch while a friend is in town visiting this week.  She will want to go to the beach each day and stuff ourselves with wonderful food from her favorite spots down here.  Guess I need to be a good hostess right?!?!?! 
I will still be uploading new items on my artfire account as often as I can.  I just added a cute matched pair of pink and brown beads that I made for someone to turn into earrings! 
Here is a link to the pair:
http://www.artfire.com/modules.php?name=Shop&op=listing&product_id=2833192

See you back here in about a week and a half with some new beads fresh from the torch!